FULL GUIDE
Meta Ads
Step-by-Step Guide to Setting Up Your Facebook Presence
Creating a Facebook Page
Log in to Facebook: Access your account and navigate to the Pages tab on the left side.
Create a New Page: Click Create New Page beneath Your Pages and Profiles.
Enter Details: Input your Page name and select a category.
Finalize Creation: Click Create Page.
Enhance Your Page: Add a bio, profile picture, and cover photo to establish your brand.
Setting Up Business Manager
Access Business Manager: Go to business.facebook.com/overview.
Create Your Account: Click Create Account.
Enter Business Information: Provide your business name, your name, and your work email.
Business Details: Complete your business information and click Submit.
Adding a Page to Business Manager
Open Business Settings: Click the gear icon in the sidebar.
Select Accounts: Under Business Assets, choose Pages.
Add Your Page: Click Add in the dropdown.
Input Page Name/URL: Enter your Facebook Page name or URL.
Complete Addition: Click Add Page—your Page will appear on the next screen.
Adding an Ad Account
Navigate to Business Settings: Go to Business Settings.
Access Ad Accounts: Click on Accounts in the left menu, then select Ad Accounts.
Add Ad Account: Click the blue Add dropdown.
Choose Option: Select to Add an ad account, Request access, or Create a new ad account.
Input ID: If requesting or adding, enter the ad account ID found in Ads Manager.
Set Permissions: Follow prompts to assign people and access levels.
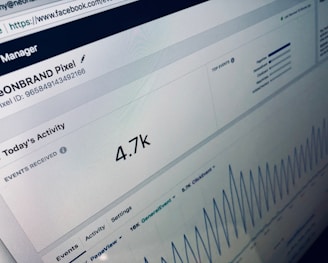
Setting Up Meta Pixel
Go to Events Manager: Open Events Manager.
Connect Data Sources: Click Connect Data Sources and select Web.
Select Meta Pixel: Click Meta Pixel, then Connect.
Add Pixel Name: Enter a name for your Pixel.
Website URL: Input your website URL for setup options.
Install Pixel: Follow prompts to install the Pixel on your website.
Setting Up Conversions API
Open Events Manager: Navigate to Events Manager.
Add Events: Click Add Events below the activity chart.
Select New Integration: Choose Add New Integration.
Choose Conversions API: Click Set Up next to Conversions API.
Set Up Manually: Click Set Up Manually, then click Next.
Further Assistance
For detailed guidance on any step, click on the respective links provided. Following these steps will ensure your Facebook Page is established, integrated with Business Manager, and equipped with Meta Pixel and Conversions API to enhance performance tracking and ad targeting.